

Definitive Guide to Air Venturi Avenge-X
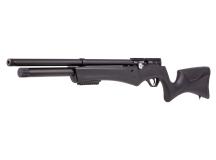
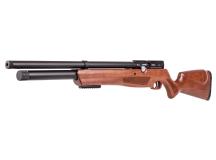
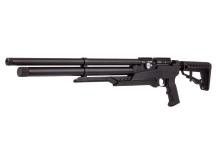
If we reference the stark contrast between the Avenge-X and the original Avenger throughout this article, it's only because the changes are so dramatic and improved across the board. The original Avenger changed the game with its amazing price point and equally amazing feature set. The Avenge-X air rifle carries that forward with a vastly improved entry-level model. The Avenge-X Classic's synthetic stock is nothing like the original. This stock is sturdy. It feels great in the hand and when pulled to the shoulder. The ergonomics are right on point.
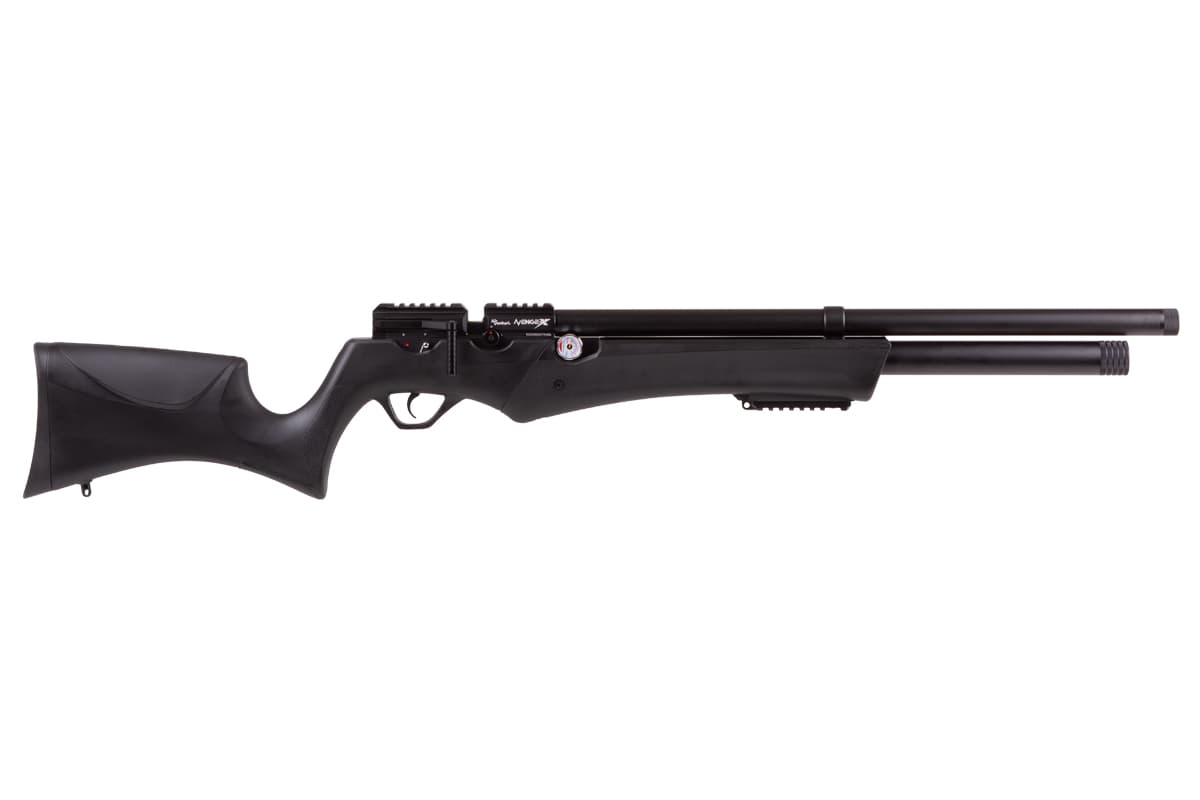
Starting from the rear of the ambidextrous stock, we have an adjustable buttstock. Simply pull out the spring-loaded buttpad, position it higher or lower, and it will lock back into place. Moving forward, you'll find the adjustable cheekpiece, which is adjusted by an Allen screw on the bottom. The textured grip is next. The angle is almost that of a pistol grip without going too far. Traditional shooters should really like this design. The trigger guard is molded into the stock and has holes for reaching in and adjusting the trigger. The foregrip is tapered well and not too thick. At the front is a weaver rail for mounting a bipod. The rail is very sturdy, with no noticeable impact on stability when shooting from the bench.
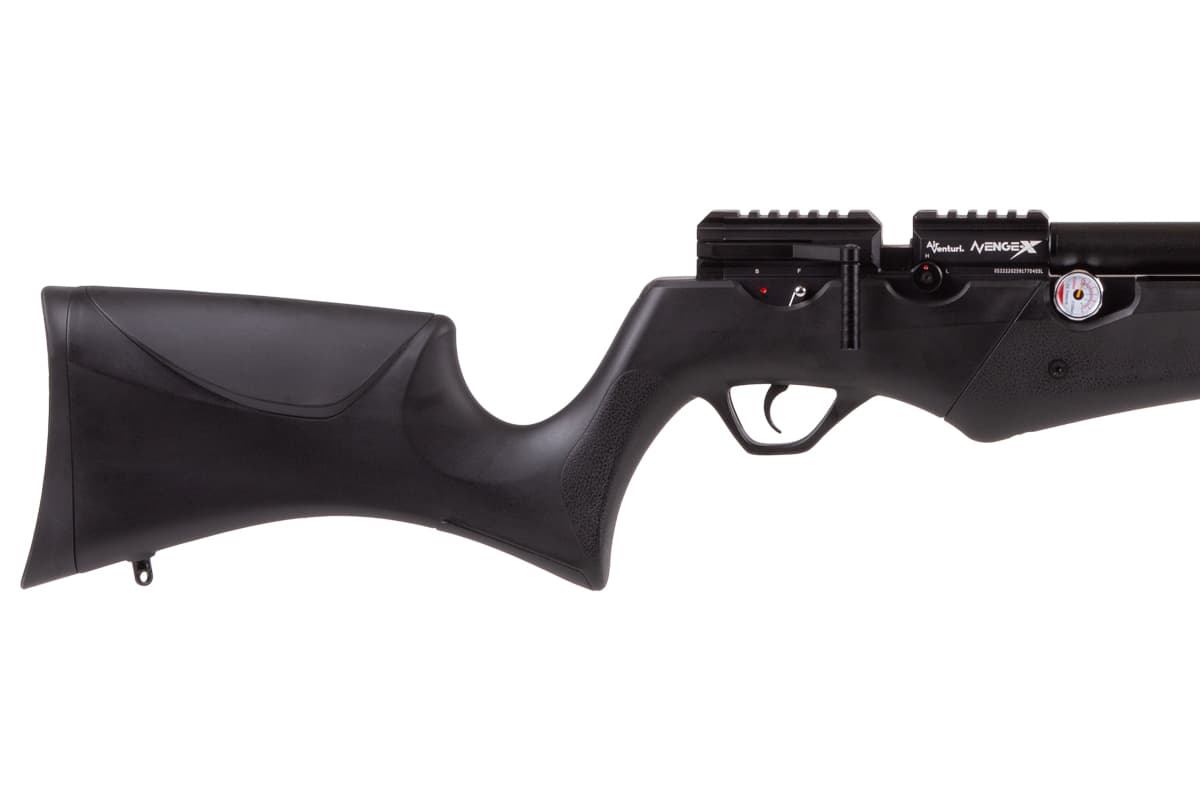
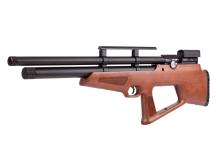
Let's move up to the receiver, starting from the rear of the action. The side lever is reversible for right or left-handed shooters. The cocking handle is sturdy and feels great when cocking. This is the first example of some of the shootability improvements found in the Avenge-X PCP pellet rifle. The safety is located under the cocking handle on the right side of the receiver.
Next, we come to the slot for the magazine or single shot tray. This version has high-capacity magazines available in all three calibers. (We'll get into that in the usage section of this article.) The simple high and low power transfer port adjuster is just below and in front of the magazine.
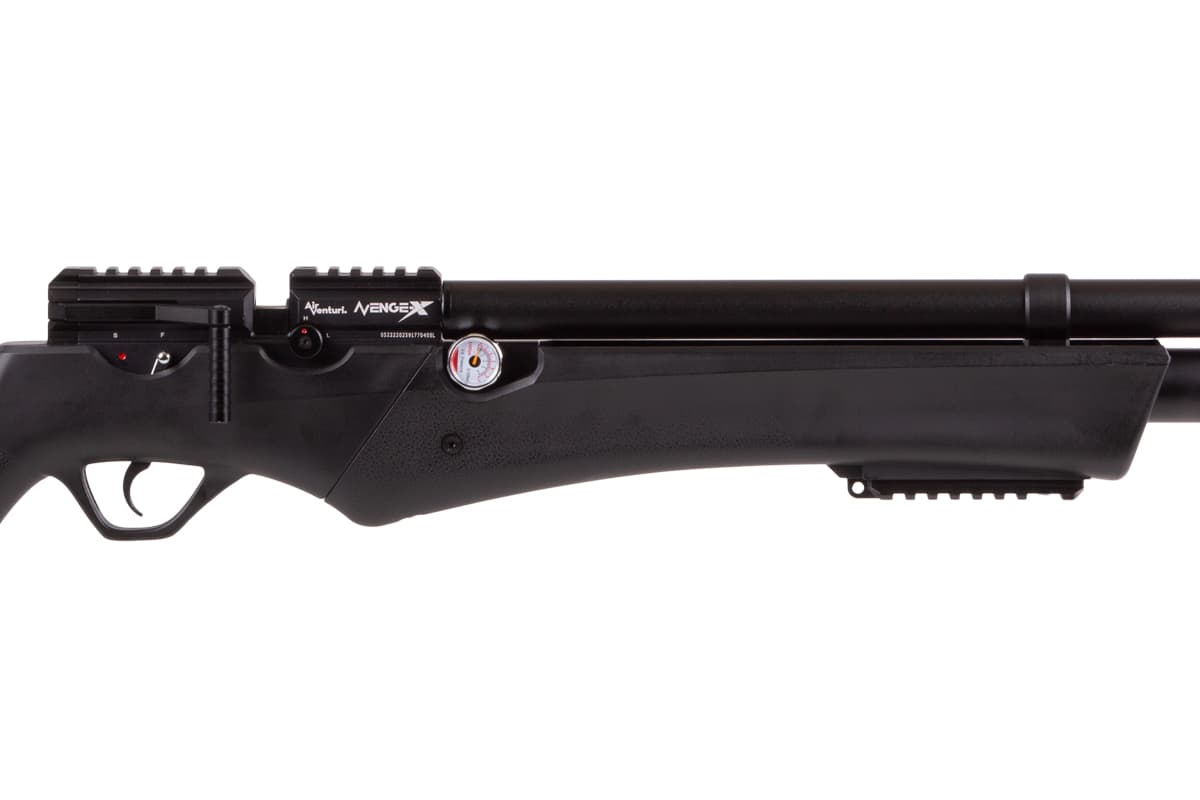
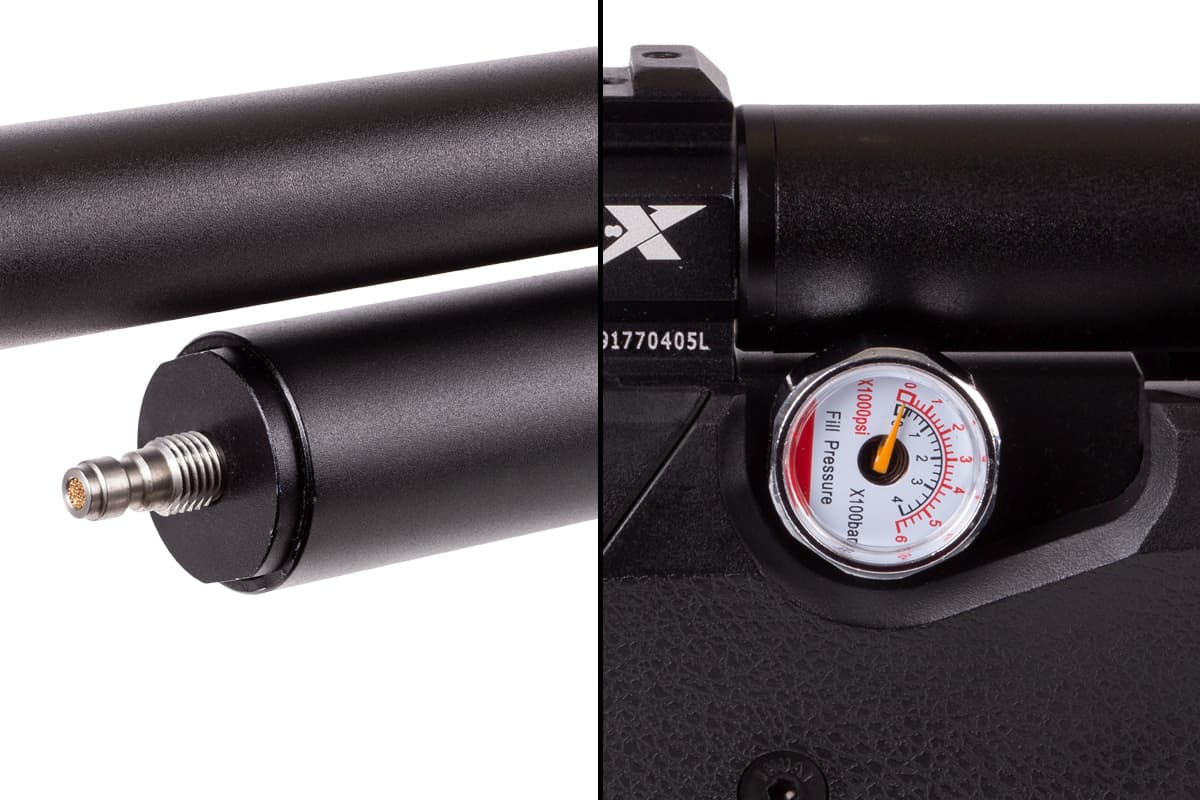
As we move past the receiver and still on the right side of the gun, we get to the fill pressure gauge, which shows you how much air pressure remains in your air cylinder or bottle. A gauge on the other side shows you your regulator pressure. The Avenge-X takes up to 300 bar and delivers a ton of shots on the factory reg setting. Details to follow.
Directly in line with the fill pressure gauge is the air cylinder. The air cylinder is filled via a foster quick disconnect at the end of the cylinder. The rifled, steel-shrouded barrel is above the air cylinder. This entire assembly is swapped out when changing calibers. It's very quick and easy. A UNF threaded fitting for accessories is at the end of the shroud.
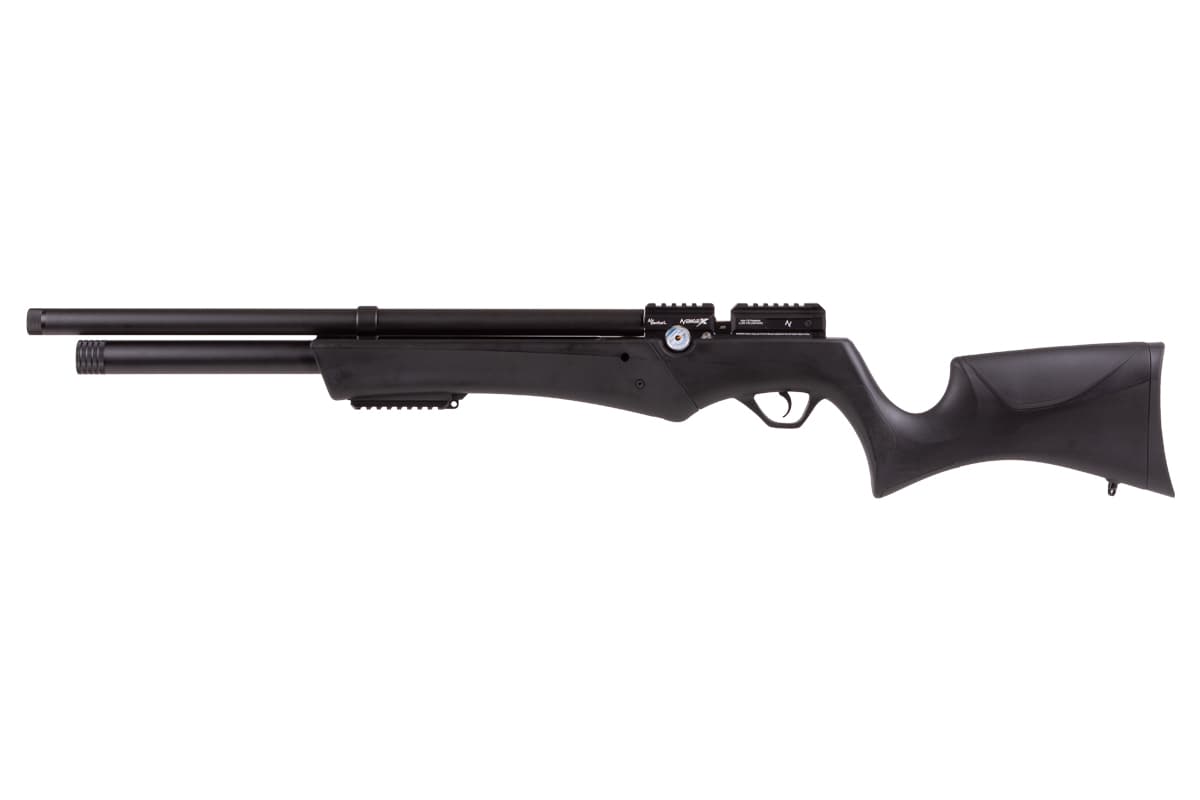
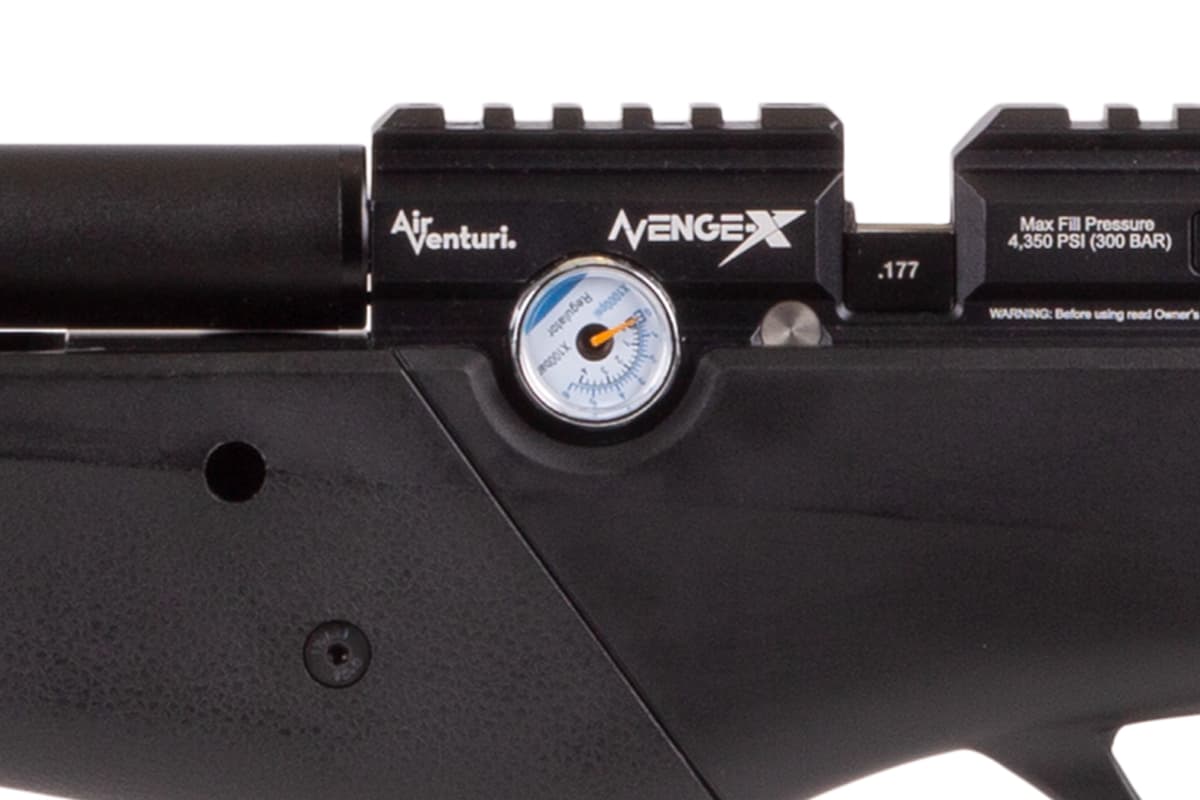
As we mentioned earlier, the airgun's left side features the regulator's air gauge. Make sure to keep your fill pressure above your reg pressure for optimal performance. Lastly, you'll find a weaver rail for your optics on top of the receiver. The original Avenger used a slotted dual receiver but also allowed for 11mm scope mounts. Given that most shooters are all using Weaver or Picatinny mounts, this change makes good sense.
The last thing you'll need to do before getting ready to shoot is to choose and mount an optic. We chose the Hawke Sidewinder SF 6-24x56 with the SR Pro II IR Reticle. We used high mounts to give our mag plenty of clearance. That choice will become more clear later.
Let's get our Avenge-X ready to shoot. Before you can send lead down range, you need to fill your airgun with high-pressure air. While the 210cc air cylinder is not all that large, getting it to 300 bar can be a challenge with a hand pump. We'd recommend using a personal compressor like the Air Venturi RovAir. Not only will it make normal shooting much more enjoyable, but it will also come in handy once you start to tinker with reg settings.
Once you have your airgun filled to 300 bar, it's time to load your mag. The standard mag sizes are as follows. The .177 and .22 both have 10-shot standard magazines. The .25 standard magazine has 8 shots. The high-capacity magazines deliver more shots on tap as follows: .177 has 20 rounds, the .22 has 16 rounds, and the .25 has 13 rounds. One important point of note is that the high-capacity mags protrude higher than the standard mags. So, if you plan to use them, ensure that your scope rings provide enough clearance.
Loading the mag is very straightforward. You'll rotate the cover clockwise, which rotates the inner cylinder. Insert your first pellet, which locks the inner cylinder in place. Now, backfill the pellet slots as you rotate the cover counterclockwise to the closed position.
If your gun is not already on safe, make sure to put it on safe before loading the magazine. Open the cocking handle, which pulls back the pellet pusher, and insert the mag until it clicks into place. Close the cocking handle. Now you are ready to take your first shot.
When you are ready and have your target in sight, release the safety and gently squeeze the trigger. The trigger is fully adjustable. Our model shipped with a pull weight of under 1.5 pounds and can be adjusted to your preference from there. To take your next shot, simply work the side lever back and then forward again, and you're ready to go.
Performance and Accuracy
Before we started shooting, we took stock of our fill pressure and reg pressure. Our fill pressure was sitting right at 300 bar, and our reg pressure was at 200 bar or around 2900 PSI. After our first shot, the reg pressure dropped to 2400 psi, and after shot three or four, the reg settled at around 2000 psi. We feel that 2000 psi is about the right pressure for a .177 PCP, so that's good. But why did it start so high? As we did more testing, we found that after each fill to 300 bar, we needed to shoot 2 or 3 shots to get the reg to settle back down to 2000 PSI. While not ideal, this is not that atypical for regulated airguns. Even expensive guns generally take a couple of shots after a filling to settle down to their optimal setting. We were just not used to seeing it so plainly shown on the gauge, which happens to be right in view for right-handed shooters.
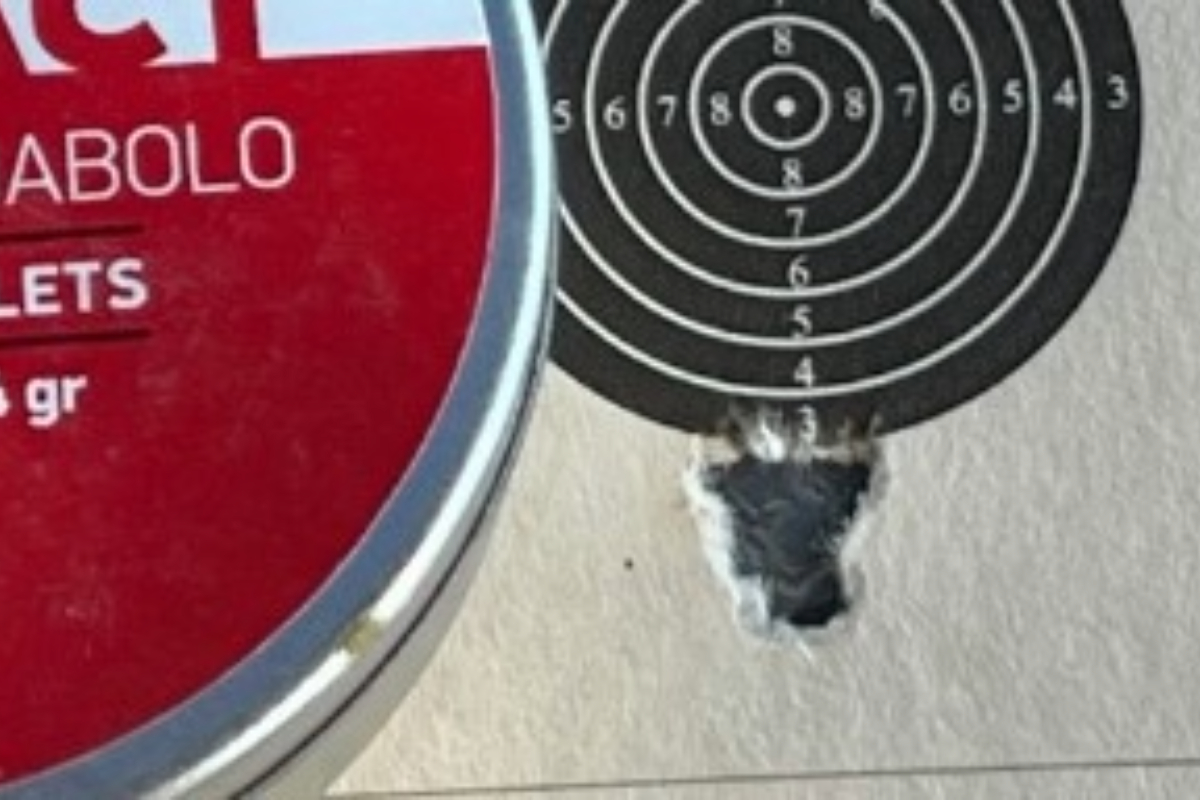
With that question solved and out of the way, it was time to get in some pellet testing. We found that the heavier 10.34-grain JSBs did pretty well shooting at 25 yards. But the even heavier 13.43-grain JSB Knockout slugs simply blew our minds, shooting almost a SUB-MOA 10-shot group at 25 yards.
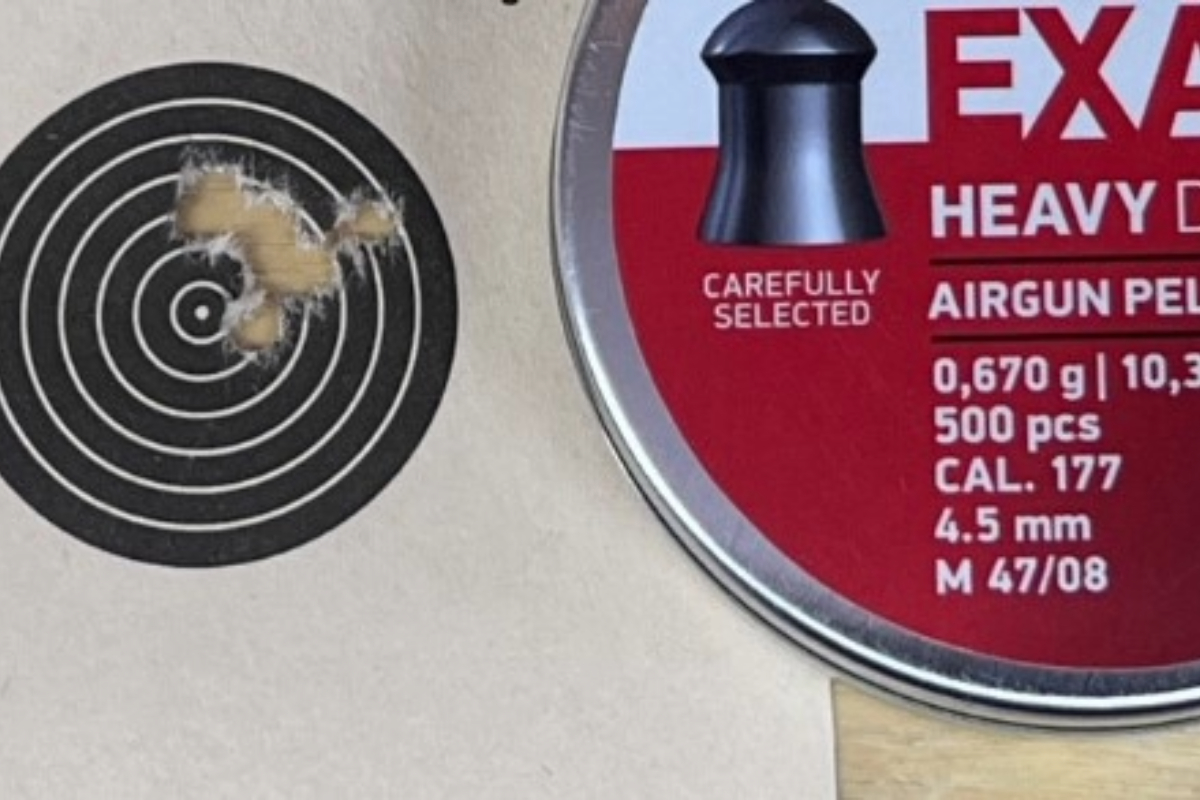

With both pellets shooting so well, we decided to take things out to 50 yards.50 yards can be a stretch for many airguns, but it's a real challenge for .177 airguns. The 10.34s opened up a bit at 50 yards, but the 13.43 JSB Knockout slugs still put on a show.
The results from the 13.43-grain KnockOut slugs are simply amazing. For those who want to shoot .177 slugs, the factory settings may be close to ideal, delivering an average velocity of 888 FPS and 23.5 FPE.
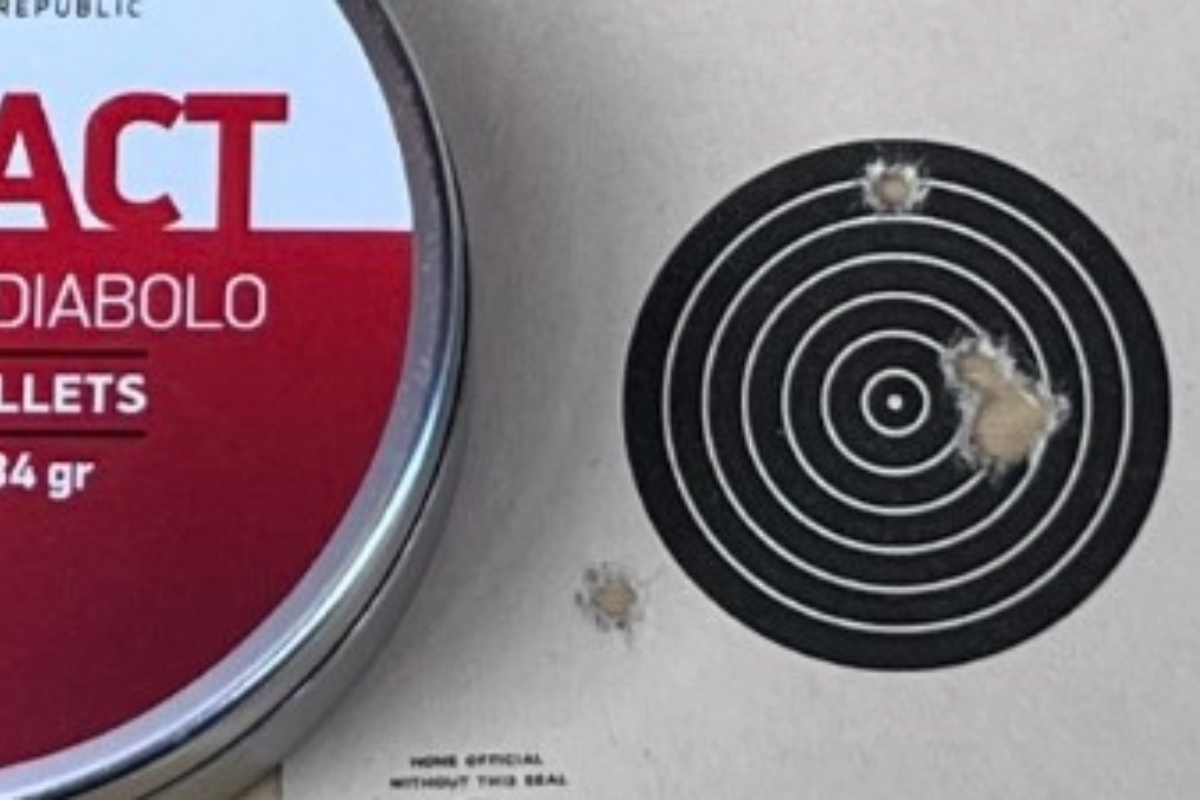
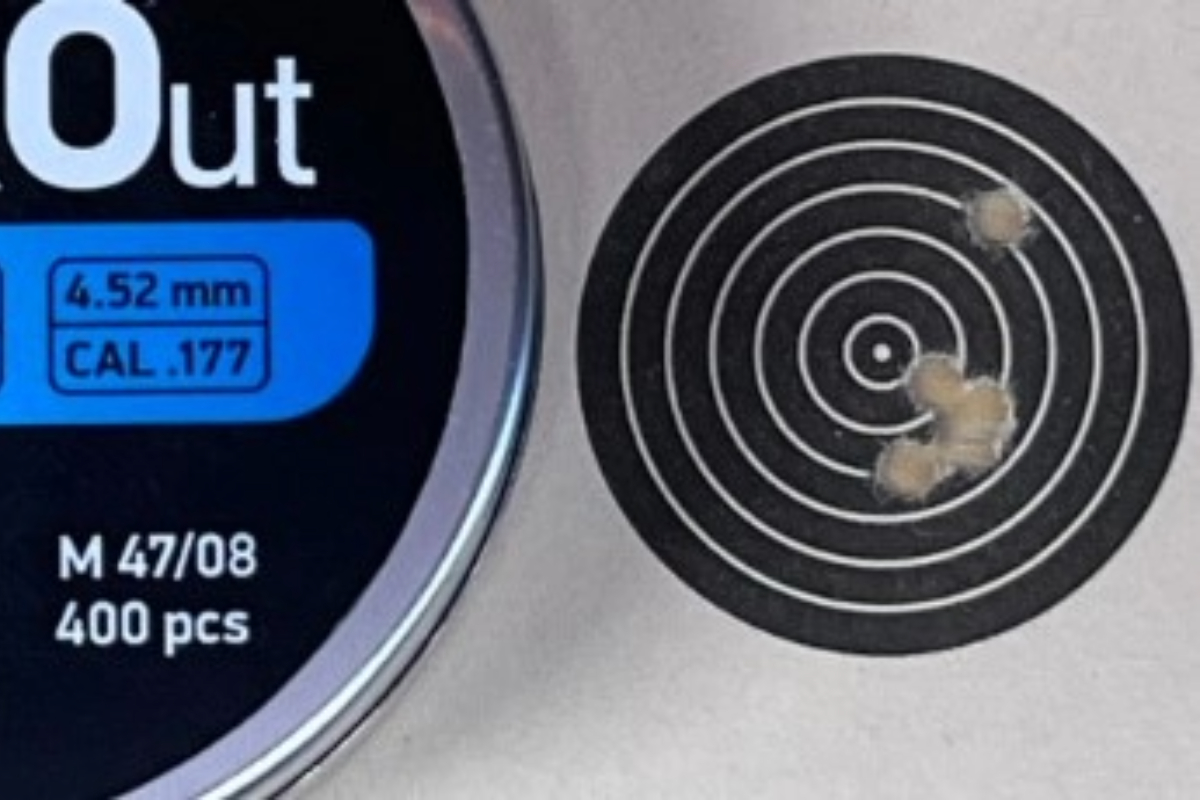
Now, let's talk about shot count and velocity. The shot count at factory settings was impressive. We consistently got 80 shots per fill before we started to fall off the reg. The average velocity with the 10.34-grain JSB pellets was 959 FPS and 21 FPE. We could probably get better pellet accuracy by slowing things down a bit. Fortunately, that's easy to do with the Avenge-X's externally adjustable regulator and hammer spring. Do remember that reducing the reg pressure requires degassing the gun before making any adjustments. But we also have another option. Remember that power adjuster on the side?
Generally, Low vs High power adjusters have a pretty big swing. We expected the same with our Avenge-X pellet rifle, but the engineers thought ahead and built a very usable variance. By selecting low power, the 10.34s dropped by about 110 FPS and delivered an average of 846 FPS and 16.5 FPS. Additionally, the 25-yard accuracy improved dramatically. So, dropping down to low power could provide better accuracy if you are shooting pellets. If you want to shoot heavier pellets or slugs, running on high power may deliver some really great results. Being able to switch so easily without having to adjust the reg or hammer spring is really awesome. You may have a lower POI (as seen in the photo below), but a good mil-dot scope should help you make that adjustment on the fly.
Summing Up
The Air Venturi Avenge-X PCP rifle is not just a sloppy attempt to leverage the success of the original Avenger. This is a whole new design of the platform, and it far exceeds the original. From the improved synthetics to the shooting system to the interchangeability, the Avenge-X is going to be the airgun to beat.
Please Note: You must be 18 years of age or older to order and conform to all laws governing the use and ownership of airguns in your local area. More Info
2025 Airgun Depot, 12453 S 265 W Suite F, Draper, UT 84020. All rights reserved. Terms of Use