Getting on target can be a challenge for most shooters, especially those new to the sport. How exactly do you adjust for that shot that’s two inches low and to the left? Do open sights adjust differently than a scope? Hopefully, this article will answer all these questions and help you get all your shots in the 10 ring.
Open Sights vs a Traditional Optic
If you are new to shooting and you just got your first airgun, then getting your shots to land where you want can be a challenge. However, remember that you have the power to adjust your airgun sights to your liking. Airguns are rarely, if ever, set up and sighted correctly right out of the box. Manufacturers expect that you will do that work once you get the product.
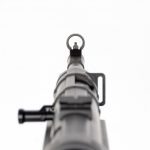
Starting with open sights is not only a practical choice but also an ideal one. It’s an important skill set, much like learning how to drive with a manual transmission. Once you’ve mastered it, you’ll always have it as an option. Let’s take an airgun like the Gamo Arrow. It’s an affordable PCP air rifle that comes equipped with some pretty decent fiber optic, micro-click, adjustable open sights. As a general reference, be sure to review the details in the manual. Here’s a look at what you should find:
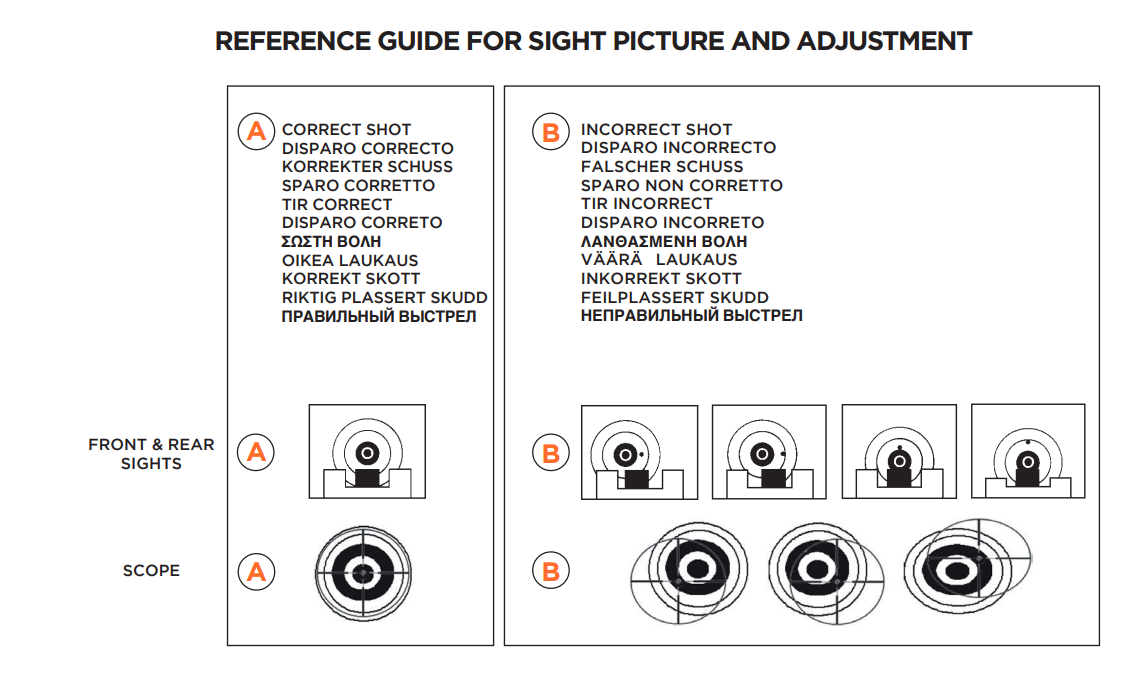
As you can see, you want to model your sight picture after the images in illustration A, with the front sight level and equidistant between the notch in the rear sight. Be sure not to obscure your target but rather have it above and centered, as shown in the illustration.
Once you have your sight picture, it’s time to get your shot on target. Here’s the basic rule of thumb: move the rear sight in the direction you need to move your point of impact. So, if your shots are consistently low, you will want to RAISE your rear sight until your impact is in the center of your target. Conversely, if your point of impact is consistently too high, you’ll want to LOWER your rear sight until your shots land in the center of the target. The same works if your point of impact is right or left of the center. If you are consistently hitting to the left of the target, then move the rear sight to the RIGHT until you are happy with the results. If you are hitting to the right of the target, then move your site to the LEFT until your shots are landing in the center of the target.
Remember to take at least 3 shots between adjustments and then move the center of your grouping as needed. Be sure to verify your adjustments with a few 3 to 5-shot groups just to make sure you are 100% on target.
Adjusting Your Scope
Now that you’ve mastered adjusting your open sights, let’s move on to adjusting your scope. Many airguns come bundled with an optic, so it’s important to know how to get on target. Once you’ve mounted your scope properly, please refer to the manual; it’s time to take a few shots to see where your shots are landing. For most backyard airguns, we recommend sighting in your scope at around 16 to 18 yards. That distance will provide a good trajectory and can limit the typical “arch” often found when sighting in either too close or too far away. 16 to 18 yards is a good starting point.
All scopes will have adjustment knobs called “turrets.” Most of them will be labeled as to which direction to turn them in order to move your point of impact. You always want to turn them in the direction you need your POI (point of impact) to move. So, if you are shooting low, then you will rotate your turret in the UP direction. If you need to move your shot lower, then you’ll rotate the turret toward the DOWN direction. The same will apply when moving your shot right or left. Always remember to turn the knob in the direction you need your POI to shift.
Be sure not to chase each shot with adjustments. Rather, shoot a 3 to 5-shot group and then adjust the group to the center of your target. Some scopes may take a couple of shots for the inner tube to settle down. It’s important not to rush the process. Take your time.
Additional Notes and Pointers
Open sights are pretty static. Once you have them dialed in, you are all set and good to go. It’s unlikely that you’ll be shooting at widely varying distances, but if you find yourself needing to adjust for holdover when shooting further out, just take your time and practice knowing what’s going to work for your gun and ammo choice.
Things are going to be different with a scope. You are going to need to learn how to adjust for distance. A good airgun scope will have some sort of aiming assistance on the reticle. This may be mil-dots or some other form of marking that allows you to accurately and repeatedly adjust for pellet drop at range. You’ll want to learn what mark lines up with what range so that you can make accurate shots regardless of the distance. Maybe we can do an article dedicated to this process called “doping your scope.” Let us know if you would be interested!
That’s a Wrap
Hopefully, you have a better understanding of how to get your airgun on target, regardless if you are shooting with open sights or an optic. Remember to always take a look at your manual for specifics about your airgun and know that you can always reach out to us here at Airgun Depot when you need help!