Your brand-new airgun just arrived, and you are eager to try it out. You also purchased an air rifle scope (make sure it’s airgun rated if you plan to install on a springer) and the recommended mounts and rings that fit, and all you need to do now to enjoy your new acquisition is to install the scope on the gun. So go ahead…install the scope and get shooting!
You haven’t put a scope on a gun before? Well, it isn’t hard, so let’s just walk through it together.
Airguns come in many shapes and sizes, and different manufacturers use different mounting systems. Traditionally 3/8″ (11mm) dovetails have been the typical rails for airguns but Weaver/Picatinny rails are becoming more popular. Both work fine, you just need to make sure your scope rings match the rail of your gun. If you come from the firearm world and are used to Weaver-style mounts but your airgun has 11mm dovetails, there are adapters that convert from dovetail to Weaver, allowing you to use mounts you already possess.
Now consider the air rifle you have purchased. Is it a heavy-recoiling springer? If so, you will want to take advantage of the scope stop that hopefully came with the gun. Often, you will find scope stop holes already provided by the manufacturer on top of the receiver between the dovetails. If the scope mounts you purchased have a scope stop pin, the pin goes in the hole to prevent the entire mount and scope from creeping back on you when shooting. If there are no holes provided, then you can install a scope stop near the rear of the dovetail that will provide that function for you. A one-piece mount is often a good investment if you have a heavy-recoiling airgun, in that it provides a longer gripping surface than a two-piece mount. They aren’t quite as flexible as a two-piece mount, but they are very stable and lessen the need for a scope stop. If your airgun is a lower-recoiling type, either a low-powered springer or a PCP/CO2-powered gun, a scope stop is rarely called for as the recoil isn’t enough to cause your scope to creep.
Things You’ll Need
- A gun vise or rest (this case is an affordable option, but a cardboard box with steep V cutouts will work in a pinch)
- Allen or Torx wrenches (usually included with scope rings)
- Rubbing alcohol or acetone for degreasing rail
- Small pair of bubble levels or a plumb line
Mount the Rings on the Rail
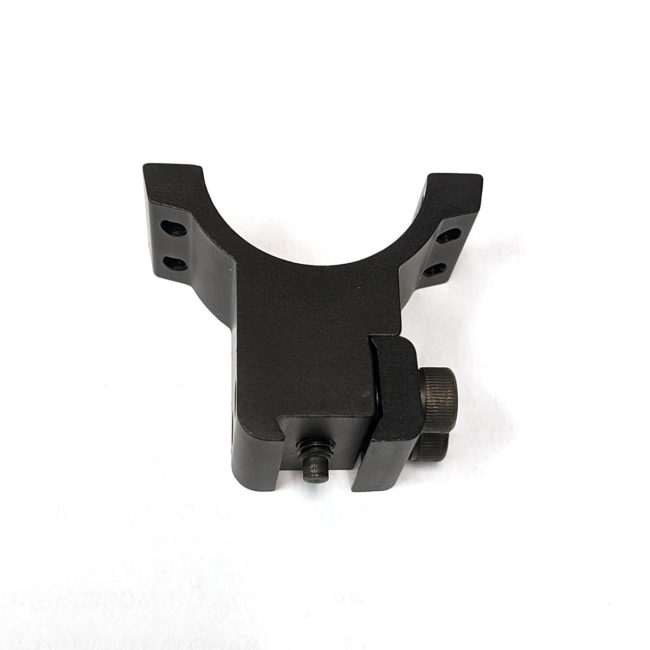
The first step is to take the top of the rings off the scope mount and fasten the mounts to the gun. Place them so that both mounts (if a two-piece mount) have the securing screws on the same side.
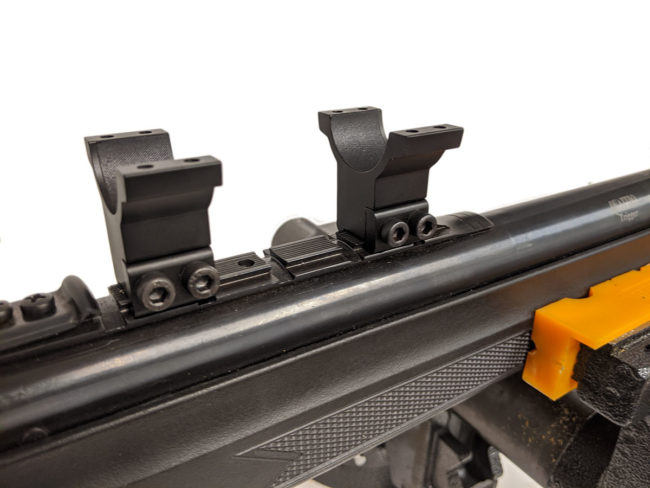
Helpful hint: If you are mounting two-piece rings on a powerful springer you will want to use the scope stop pin. It is a small bolt that screws through the base of the ring and fits into the scope stop drilled into the receiver. Get the ring aligned with the scope stop that works best for your eye relief (see below), tighten it up, and screw the scope stop pin down until it is securely in the scope stop. If it is too shallow, it may creep and gouge the rail. Then continue with the rest of the process.
Don’t bear down on the fastening screws yet, as you may need to make some adjustments.
Set the Scope in Place
Place your scope in the rings and place the top half of the rings on the mount. Fasten the top of the rings just enough to hold the air rifle scope in place, yet allowing you to still be able to turn and slide the scope forward and back.
Get Correct Eye Relief
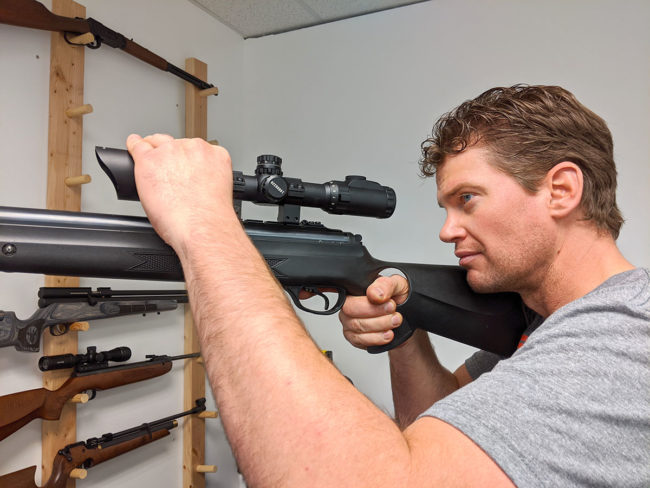
Now position the scope so that the eye-relief is to your liking, perhaps 2″ to 4″. (Eye-relief is the distance from your eye to the rear of the scope, the part that you are looking through.) The best way to determine eye relief is to bring the gun to your shoulder with your eyes closed. Now open them and see where the scope is. If there is a black shadow around the sight picture you will need to move the scope forward or back until you have a full field of view. Do this with the scope on both its highest and lowest magnification ranges. Eye relief will change depending on the shooting position, so if you shoot prone or at a bench test the eye relief in those positions and make adjustments if needed.
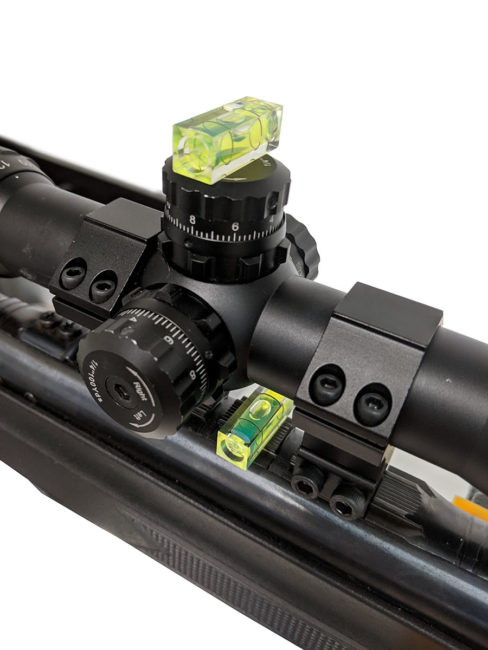
Vertically Align the Crosshairs
This is an important step! The basic principle here is that the reticle needs to be as close to vertical as possible when you are shooting, otherwise any adjustments that you make to the scope will throw off the point of impact. The vertical reticle in the scope needs to divide the gun in half when you look through it and this can be achieved in a few different ways.
A rough and ready way to align the reticle is to shoulder the gun, look through the scope at a corner of a wall or a plumb bob or something else that is perfectly vertical and rotate the scope until it is aligned vertically with it.
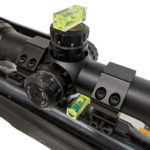
A more precise way is by using a pair of small bubble levels (One can be used in a pinch, but it is more of a pain.) Place the gun in the vise or the rest and put one of the levels on the rail. Adjust the gun until it is level. Now put the other level on top of the scope turret and rotate the scope until it is level. If you have turrets that raise up for adjustment make sure they are pushed down, otherwise they may not be level. Double-check that the gun is level and, assuming that the scope turret is level, your scope should be vertically aligned with the gun and ready to be tightened down.
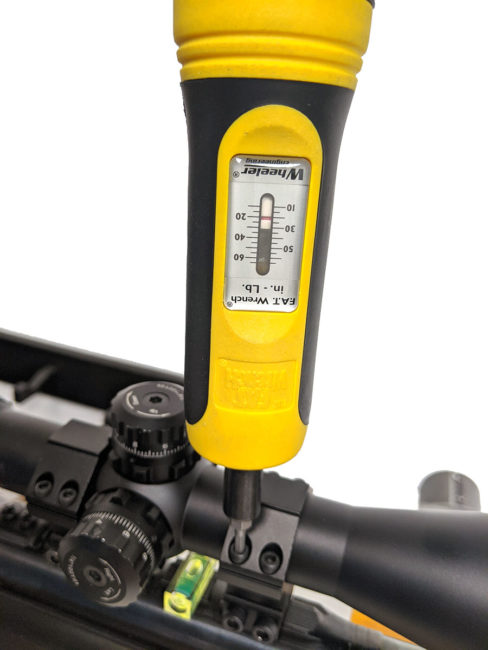
Tighten the Scope Rings
Now that you have the correct eye-relief adjusted, and your scope is mounted evenly in the rings, fasten the rings down on the scope by alternately tightening the screws. On a four-screw ring mount, I normally do two on the front (diagonally positioned from each other), then two in the back. Just do a quarter turn or so on each. I then fasten down the others, alternating from front to back. It’s sort of like changing a flat-tire…you tighten the lug nuts alternately, not the ones next to each other.
Be careful that you don’t bear down too hard on the ring screws….you can damage the tube of your scope, which certainly isn’t your intention. Most PCPs have virtually no recoil to knock the scope out of zero so you don’t need to apply a lot of pressure. Springers will need a little bit more, but it is still better to err on the side of caution. A handy tool, if you are going to be mounting scopes very often, is the Wheeler Fat Wrench which lets you tighten the rings to the manufacturer’s specification (usually between 15-22 inch-pounds) taking all the guesswork out. After the rings are tightened down, go back and tighten the entire mount to the gun.
Barrel Droop
This occurs when the barrel isn’t exactly centered and aligned with the breech and receiver. It can be off-center in any direction, but most commonly it droops downward.
A condition that can afflict any airgun or firearm for that matter, but which is found frequently among break barrels, is barrel droop. Basically barrel droop is when the barrel doesn’t line up perfectly with the receiver, and it can be off to one side, but more commonly it will be pointing slightly downwards. Since the open sights on a break barrel are on the barrel itself, shooting with open iron sights will not affect your point of aim. However the scope is mounted on the receiver, not the barrel, so that is when you will notice a problem.
If your gun has barrel droop you will need to compensate for it. The best way is by using a special mount that either has droop compensation built into it or can be adjusted. We highly recommend the BKL adjustable mounts for break barrels and the FX No Limits rings for PCPs.
Shimming a Scope
If buying new rings is not an option, you will need to shim the scope in the rear mount to more closely align the scope with the barrel. There are different materials you can use, from tape to strips of aluminum cut from a drink can, or a two-liter soda bottle. It doesn’t take much so don’t use anything very thick because that can damage the scope tube. Cut the material to fit in the bottom half of the rear scope ring and lay the scope on top of it. Then follow the standard procedure for tightening up the scope rings.
Sighting In
Now for the fun stuff! Sighting in an air rifle is very easy and won’t take you more than ten or twenty minutes at the most. Take a paper target and place it in front of a safe backstop ten yards away. We always recommend you use protective eye wear but it is even more important since you are so close to the target. Take a few shots at the center of the target, seeking to just get on paper. Aim for the bullseye and see where the pellet hits. Ideally, you would be directly in line with the bullseye vertically and about 1” low. This would put you right at zero at around 20 and thirty yards for most guns, but this will depend on the pellet you are shooting and the velocity your gun shoots at.
But, since your pellet didn’t land exactly in line with the bullseye and about an inch low, you will need to do some sighting. There are two ways of getting your rifle zeroed. If you are seated at a bench with a stable rest, point the gun at the bullseye and then use the turrets to move the crosshairs to the point of impact. Now fire another shot at the bullseye and see where you are. You should be pretty close and you can make adjustments as needed to get right on.
If you are not seated at a bench with a stable rest use the turrets to move the crosshairs in the direction they need to go. So, if you hit low and to the right, for example, turn your windage (side) turret clockwise to move the reticle left and turn the elevation (top) turret counterclockwise to raise it up. Since you are really close you will need a lot more clicks to move the reticle than if you were out at 50 or 100 yards. Once you are about centered and an inch low, move the target out to the range that you plan on shooting at the most and finish zeroing it.
Of course, as you try out different pellets trying to decide which one your gun prefers, you will need to adjust the scope.
Mounting a scope isn’t hard, and the method described above will suit the vast majority of airgunners. Now you’re ready to go shooting. Enjoy!